If you’ve ever found yourself mesmerized by a lifelike chocolate sculpture—say, a full-sized lion or a vintage espresso machine—Amary Guichon chocolate art has redefined pastry showpieces for the social-media age. This modern-day Willy Wonka has taken chocolate art to levels we never imagined, combining culinary mastery with intricate engineering. But the best part? You don’t need to be a trained pastry chef or have access to a fancy kitchen in France to dive in. In this article, we’ll show you how to apply 7 proven techniques used by Guichon himself—simplified for home candy artists and chocolate enthusiasts alike. From tempering basics to structure support, we’ll walk you through how to turn melted chocolate into your own edible masterpieces.
Table of Contents
Table of Contents
Why Amary Guichon’s Chocolate Sculptures Inspire Candy Lovers
From Classic Confections to Edible Engineering
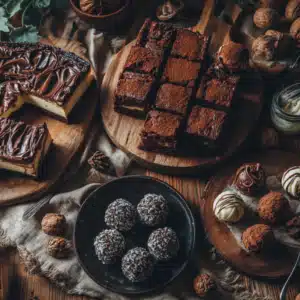
My earliest memory of chocolate isn’t the fancy molded bonbons or glossy truffles—it’s of watching my grandmother in her warm North Carolina kitchen, stirring a pot of bubbling fudge with the same focus and joy you see on Amary Guichon’s face as he sculpts a chocolate giraffe. There’s something deeply nostalgic, yet thrillingly modern, about Guichon’s work. He doesn’t just make candy; he builds edible stories, using simple ingredients and transforming them with patience, precision, and just the right touch of wonder. Much like Amary Guichon chocolate art, her fudge felt equal parts memory and marvel.
His chocolate creations—from realistic koi fish to 6-foot tall dragons—capture the imagination because they blend fine pastry techniques with artistic vision. What sets Guichon apart isn’t just the complexity of his designs, but how accessible many of his methods can be when broken down into smaller steps. That’s exactly what we’ll do here.
On my blog, Gourmet Candy Lab, I’m always looking for ways to bridge the gap between high-end artistry and at-home candy joy. Amary’s process offers just that kind of inspiration. Whether you’re intrigued by modeling chocolate or just curious about how these sculptures don’t melt on the spot, understanding his techniques helps demystify what looks impossible.
Print
Amary Guichon Chocolate Art Made Easy — 7 Proven Techniques
- Total Time: 40 minutes
- Yield: 1 medium sculpture
- Diet: Vegetarian
Description
Create chocolate sculptures at home using simplified techniques inspired by Amary Guichon. Learn how to temper, mold, assemble, and finish chocolate with professional detail.
Ingredients
- Couverture chocolate
- Cocoa butter
- Corn syrup or glucose
- Edible powder colors or cocoa-butter spray
- Modeling-chocolate tools
- Silicone molds or sculpting tools
Instructions
Temper the chocolate using the seeding or tabling method.
Pour into molds or hand-shape base pieces.
Let each piece cool completely before assembly.
Sculpt details with modeling chocolate and attach them using tempered chocolate or cocoa glue.
Chill between steps to maintain structure.
Carve or texture surfaces as needed for realism.
Finish with airbrushing or edible dust for color and effect.
Notes
- Work in a cool, dry room (about 65 °F / 18 °C) to keep the chocolate in temper.
- Wear food-safe gloves to prevent fingerprints and smudges.
- If your tempered chocolate thickens while you work, gently rewarm it with a hair dryer or heat gun on low.
- Let every layer set fully before adding weight—patience prevents cracks and sagging.
- Rest modeling chocolate overnight; knead in a pinch of cornstarch if it feels oily.
- For tall pieces, anchor sections with bamboo skewers or lollipop sticks.
- Airbrush or dust colors in thin layers; multiple light passes give the most realistic finish.
- Store finished sculptures at 60–65 °F, away from sunlight and humidity—no fridge needed.
- Traveling with your piece? Pack it snugly in foam and assemble larger elements on-site for maximum safety.
- Prep Time: 30 minutes
- Cook Time: 10 minutes
- Category: Chocolate Art
- Method: Sculpting
- Cuisine: French-Inspired
Nutrition
- Serving Size: 1 sculpture
- Calories: 3200
- Sugar: 220g
- Sodium: 90mg
- Fat: 210g
- Saturated Fat: 125g
- Unsaturated Fat: 70g
- Trans Fat: 0g
- Carbohydrates: 290g
- Fiber: 12g
- Protein: 18g
- Cholesterol: 60mg
In fact, several of Guichon’s methods are rooted in fundamentals like proper chocolate tempering—a step we also cover in our chocolate tempering tips guide—and controlled cooling, which we’ve explored in depth in our candy techniques 101 series. These foundational practices are key, and once mastered, they make bigger projects feel less intimidating.
Discovering the Passion Behind Every Chocolate Piece
Beyond his viral videos and jaw-dropping sculptures, Guichon’s true appeal is in how he makes precision feel playful. His work reminds us that candy-making isn’t just a science; it’s a form of expression. And that’s the core philosophy here at Gourmet Candy Lab too. Whether it’s your first time working with cocoa butter or you’re finally ready to try sculpting with modeling chocolate, there’s a thrill in turning raw chocolate into something beautiful—and delicious.
So if you’ve ever asked, “How do chocolate sculptures not melt?” or “Why is my modeling chocolate so oily?”—you’re in the right place. We’ll cover all that, plus more insider techniques to get you started.
For more chocolate-inspired recipes, swing by our dedicated Choco Treats category.
Craving extra chocolate inspiration? 🍫 Explore our Pinterest boards for even more mouth-watering ideas!
Amary Guichon Chocolate Techniques for Beginners
Start with Stable Chocolate Basics— the Core of Amary Guichon Chocolate Art
“You have to find techniques to accomplish your vision using a minimum amount of chocolate, because one, it’s expensive, and the more you use, the heavier the piece is; the heavier the piece, the less stable it is.” — Amary Guichon.

Even the most dramatic sculptures start with the basics—and that means mastering your chocolate. Amary Guichon emphasizes one thing again and again: tempering is non-negotiable. Properly tempered chocolate gives you that crisp snap and glossy finish while ensuring structural integrity for larger pieces. Without it, your sculpture might crack, sag, or even bloom with white streaks.
Tempering doesn’t require high-end tools. With a thermometer and some patience, you can do it right in your home kitchen. We walk through each method—including seeding and tabling—in our complete guide to chocolate tempering. Amary Guichon prefers working with couverture chocolate because of its smooth texture and stable fat content, which makes it ideal for shaping and detailing.
Once your chocolate is tempered, start by molding simple shapes. Try pouring into silicone molds or freehand shaping smaller components like leaves or petals. These are the kinds of foundational forms that Guichon layers into his larger pieces. They also help you build confidence and muscle memory—both critical in chocolate work.
To learn how to shape, pour, and set your chocolate evenly, our Candy Techniques 101 tutorial breaks it down by skill level, with examples from real candy lab tests.
Why Structure and Support Matter in Chocolate Sculpture
What makes amary gauchon chocolate art stand out isn’t just the realism—it’s the fact that the pieces stand at all. Guichon’s sculptures often tower several feet tall, balanced on narrow supports. That’s not just chocolate magic. It’s engineering.
“You have to find techniques to accomplish your vision using a minimum amount of chocolate, because one, it’s expensive, and the more you use, the heavier the piece is; the heavier the piece, the less stable it is.” — Amary Guichon
He uses a combination of internal supports, tempered chocolate beams, and sometimes edible glue made from cocoa butter or isomalt. Even in smaller home versions, understanding how to anchor pieces is crucial. When you’re stacking components like spheres or limbs, use lollipop sticks, bamboo skewers, or dowels to connect them.
When building up, always let each piece fully cool and set before adding weight. That’s a trick you’ll also find helpful in our Beginner Candy Projects, where we teach candy stacking and assembly with stability in mind.
While you won’t need a professional pastry lab, aiming for a cool, dry workspace—close to 65°F—can help prevent your chocolate from softening too soon. Even a small desk fan or portable air cooler can make a difference in warm home kitchens.
That’s exactly how Amary Guichon chocolate art achieves six-foot dragons without sagging.
Intermediate Techniques That Amary Guichon Uses
Layering, Gluing & Assembling Sculptures
Once you’ve mastered tempering and basic forms, it’s time to start building. Amary Guichon doesn’t just sculpt—he constructs. And that construction process starts with layering, attaching, and balancing components in three dimensions.
For gluing pieces together, cocoa butter-based glue or tempered chocolate works best. Use a piping bag or a small offset spatula to dab chocolate at connection points. Hold each piece in place until it begins to set, then move on. If you’re attaching curved or vertical parts, chill them slightly first to speed up setting.

In many of Guichon’s behind-the-scenes clips, you’ll see him using brushes to apply chocolate as a bonding agent. This same approach works well at home, especially with smaller figures like flowers, butterflies, or animals. You’ll find a similar assembly method in our Pastry Art Sculptures guide, which walks you through candy-based creatures and holiday displays.
Layering also adds depth. Guichon often stacks petals, feathers, or scales individually to create stunning surface textures. While this takes patience, it’s surprisingly relaxing—and deeply rewarding once the design takes shape.
Working on layered pieces is easier when using modeling chocolate, which behaves like edible clay. Our step-by-step on DIY Chocolate Gifts features several beginner-friendly layered designs that use the same materials Guichon recommends.
Using Modeling Chocolate Without the Mess
Modeling chocolate is a cornerstone in the amary gauchon style. It’s pliable, holds shape beautifully, and is perfect for sculpting fine details. But many beginners run into a common issue: Why is my modeling chocolate so oily?
This usually happens when it’s overmixed or overheated. The key is using the right ratio of melted chocolate to corn syrup (or glucose), and letting it rest overnight before use. If the mixture is greasy, knead in a bit of powdered sugar or cornstarch to absorb excess fat.
Keep your hands cool—literally. Wash with cold water before sculpting, and work in short bursts. If the chocolate softens too much, pop it in the fridge for a few minutes. You’ll avoid fingerprints and help the piece firm up before assembly.
Amary Guichon often sculpts facial features, fabric folds, or fur textures using modeling chocolate tools similar to those used for fondant. You can try this too, even with simple kitchen gear like paring knives, toothpicks, or the back of a spoon.
In our Seasonal Candy Guides, we break down how to sculpt pumpkins, snowmen, and even chocolate roses—all made easier with modeling chocolate done right.
Whether you’re sculpting miniature elements or building up a larger feature, these intermediate steps are where the magic starts to feel real. And like Guichon always shows, practice and patience turn chocolate into art.
Advanced Techniques Inspired by Amary Guichon
Airbrushing, Carving, and Realism in Chocolate
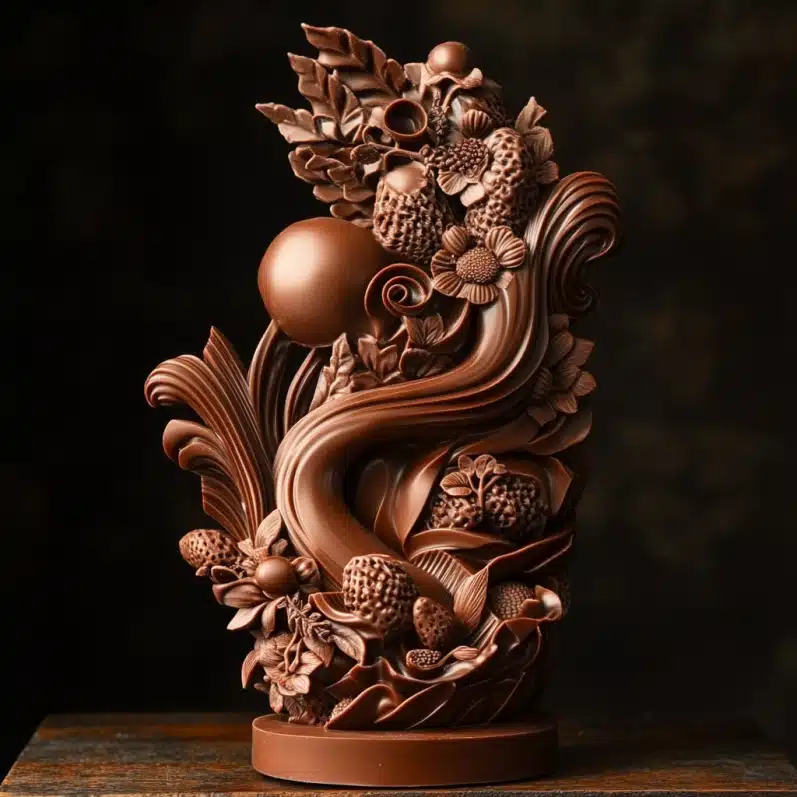
When people picture Amary Guichon chocolate art, they think of flawless airbrushing and lifelike textures that make you question whether you’re looking at dessert or a museum piece.
Amary Guichon’s most breathtaking pieces—whether it’s a lifelike baby elephant or a working clock—come alive thanks to advanced finishing techniques. Once the structure is built and stable, he brings it to life using airbrushing, sculpting, and texturing to mimic metal, wood, fabric, and fur—all in chocolate.
To achieve these effects at home, start small. Use food-safe brushes and edible powders to dust bronze or gold highlights. For more vibrant looks, an airbrush with cocoa butter-based colors can add shading and depth. Airbrushing takes practice, but it’s one of Guichon’s most powerful tools to turn a simple sculpture into something cinematic.

Want to replicate stone or wood? Use a texturing mat or carve patterns by hand before the chocolate fully sets. Sharp tools like x-acto blades or paring knives work well for shaping lines, cuts, and indentations. You can see some of these textures in action in our Gourmet Chocolate Molding series, where we explore various finishes, from smooth marble to rustic grain.
This is also where detail matters most—tiny scratches, surface gradients, and subtle highlights can elevate a project from cute to collector-worthy. Amary Guichon often carves directly into set chocolate using sculptor’s tools, blending realism and precision. You can mimic this effect in smaller projects, like figurines or centerpiece plaques.
Don’t be afraid to experiment. Even if you don’t have a full airbrush setup, edible spray paints, brushes, and cocoa butter pastes give excellent results—especially when used in thin, buildable layers.
How Long Will It Last? Tips for Display and Longevity
Chocolate art may look fragile, but with the right handling, it can last far longer than most expect. You might wonder, “How long do modeling chocolate figures last?” or “Do amary gauchon sculptures melt after filming?” The truth is: they’re made to be durable—for days, even weeks.
“Sometimes people see that I’m doing sculpture with chocolate, and they think I’m playing with food and that it’s wasteful. … What they don’t realize is that we don’t waste any chocolate here at the school. We can melt a showpiece down completely and reuse 100 percent of it.” — Amary Guichon
Guichon works in climate-controlled conditions to ensure stability, but you can still get great results by keeping your piece out of direct sunlight and away from moisture. Chocolate doesn’t need refrigeration—just a steady, cool environment around 60–65°F with low humidity. Avoid touching finished surfaces too much, since cocoa butter picks up fingerprints easily.
For extra insurance, you can even seal your sculpture lightly with a thin coat of edible lacquer spray. This helps protect against air exposure and extends visual appeal—especially if you’re planning to gift or display your work. We offer more pro-tips like this in our Chocolate Caramel Recipes section, where presentation matters as much as flavor.
Transporting your piece? Stabilize it using foam padding and food-safe wraps. A sturdy box with inserts helps prevent jostling. If building tall, construct the sculpture in modular sections you can assemble on-site—just like Guichon often does when working on large showpieces for hotels or TV sets.
In the end, chocolate art is meant to be enjoyed—but with care and creativity, it can hold its form long enough to wow any audience. Whether you’re recreating an amary gauchon masterpiece or inventing your own, these expert-level techniques let you finish strong.
Practice these steps and your own Amary Guichon chocolate art journey will feel inevitable.

Frequently Asked Questions
Who is the best chocolate artist in the world?
While there are many talented pastry chefs across the globe, Amary Guichon is widely recognized as one of the best chocolate artists today. His ability to transform chocolate into lifelike sculptures—ranging from animals to functional machines—has captivated millions online and inspired professionals and hobbyists alike. His unique blend of technical skill and artistic vision sets him apart in the world of edible design.
Are Amary Guichon sculptures edible?
Yes, every piece of an Amary Guichon sculpture is entirely edible. He works exclusively with food-grade materials, including tempered chocolate, modeling chocolate, cocoa butter paint, and occasionally isomalt or pastry elements. Despite their visual realism, his creations are designed to be both stunning and consumable—though most fans would rather admire than bite.
How do chocolate sculptures not melt?
Chocolate sculptures like those made by amary gauchon stay intact due to proper tempering and cool working conditions. He often builds in environments maintained at around 60–65°F to prevent softening. Additionally, structural pieces are cooled and layered gradually, with internal supports keeping everything stable even under hot lights or during long events. That temperature discipline is the silent hero of Amary Guichon chocolate art longevity.
Why is my modeling chocolate so oily?
Oily modeling chocolate is usually the result of overmixing, using too much corn syrup, or working in a warm environment. To fix this, let the mixture rest overnight, and if needed, knead in cornstarch or powdered sugar to absorb excess oil. Amary Guichon recommends working in short bursts and chilling the chocolate briefly between steps to prevent melting.
What cream do you use for ganache?
For smooth, stable ganache, most pastry chefs—including Guichon—use heavy cream with a fat content of around 35–40%. This creates a rich, emulsified texture perfect for truffles, coatings, and fillings. For vegan versions, coconut cream or oat-based alternatives also work well, though ratios may need adjustment.
How long do modeling chocolate figures last?
When stored properly in a cool, dry place, modeling chocolate figures can last several weeks. They don’t need refrigeration, but should be kept out of direct sunlight and sealed from humidity. Like Guichon’s sculptures, home projects made with modeling chocolate are surprisingly durable if handled with care.
Conclusion
What makes Amary Guichon such a compelling figure in the world of chocolate isn’t just the jaw-dropping artistry—it’s his ability to bring people closer to the craft. His methods may look advanced, but when broken down into key techniques like tempering, layering, modeling, and airbrushing, they become approachable even in a home kitchen.
Whether you’re inspired to build a mini chocolate sculpture or just want to troubleshoot oily modeling chocolate, these 7 proven techniques give you a starting point. And the best part? The creative spark you feel when working with chocolate—that’s the same one that fuels Guichon’s masterpieces.
Now it’s your moment to turn chocolate into something unforgettable—one delicious detail at a time.